Stripe is a widely used payment service provider that supports credit cards, digital wallets, and several other payment methods. Business owners can use it to offer flexible payment options to customers. Stripe charges a fee on each transaction.
This guide explains how to configure Stripe for PCI compliance and how to integrate it with your CRM system.
Enable PCI-Compliant Settings in Stripe #
To handle card data directly, you must enable advanced PCI options in Stripe and acknowledge the associated responsibilities.
- Log in to Your Stripe Account
Go to https://stripe.com and log in to your account. - Search for PCI Settings
Type “PCI” in the search bar of your Stripe dashboard. - Go to Integration Settings
Navigate to Settings > Integration, then click Show Advanced Options. - Enable Card Handling Option
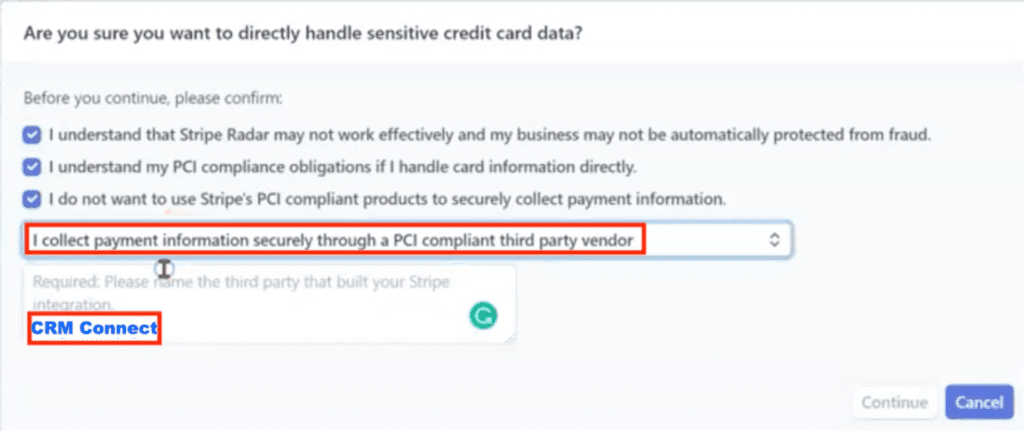
Turn on “Handle card information directly”. - Acknowledge PCI Risks and Liability
You must certify that you understand the risks of not using tokenization. You also need to explain your reason for bypassing Stripe’s tokenization.
Note: You may not claim that your integration doesn’t support tokenization or that PCI compliance is handled by Stripe.
Also, your website must be secured with SSL, which is a basic requirement for PCI compliance.
Steps to Integrate Stripe with the System #
Follow these steps to connect Stripe as a payment processor in your system.
Get the Stripe API Key #
- Log in to Your Stripe Account
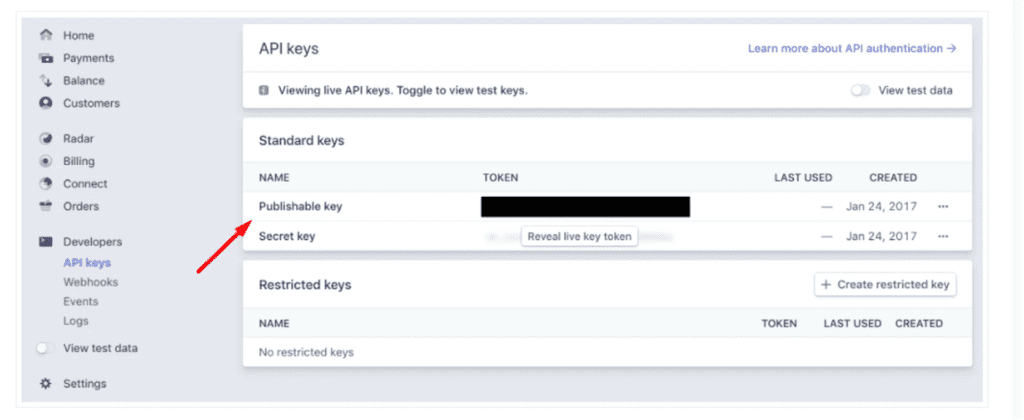
Visit https://stripe.com and sign in. - Access API Keys
From the dashboard, click on API Keys. - Copy the Publishable Key
Locate the Publishable Key and click Copy.
Connect Stripe with GlideCampaign #
- Open CRM Settings
Navigate to the Settings menu on the left panel. - Go to the Integrations Tab
Click on the Integration tab.
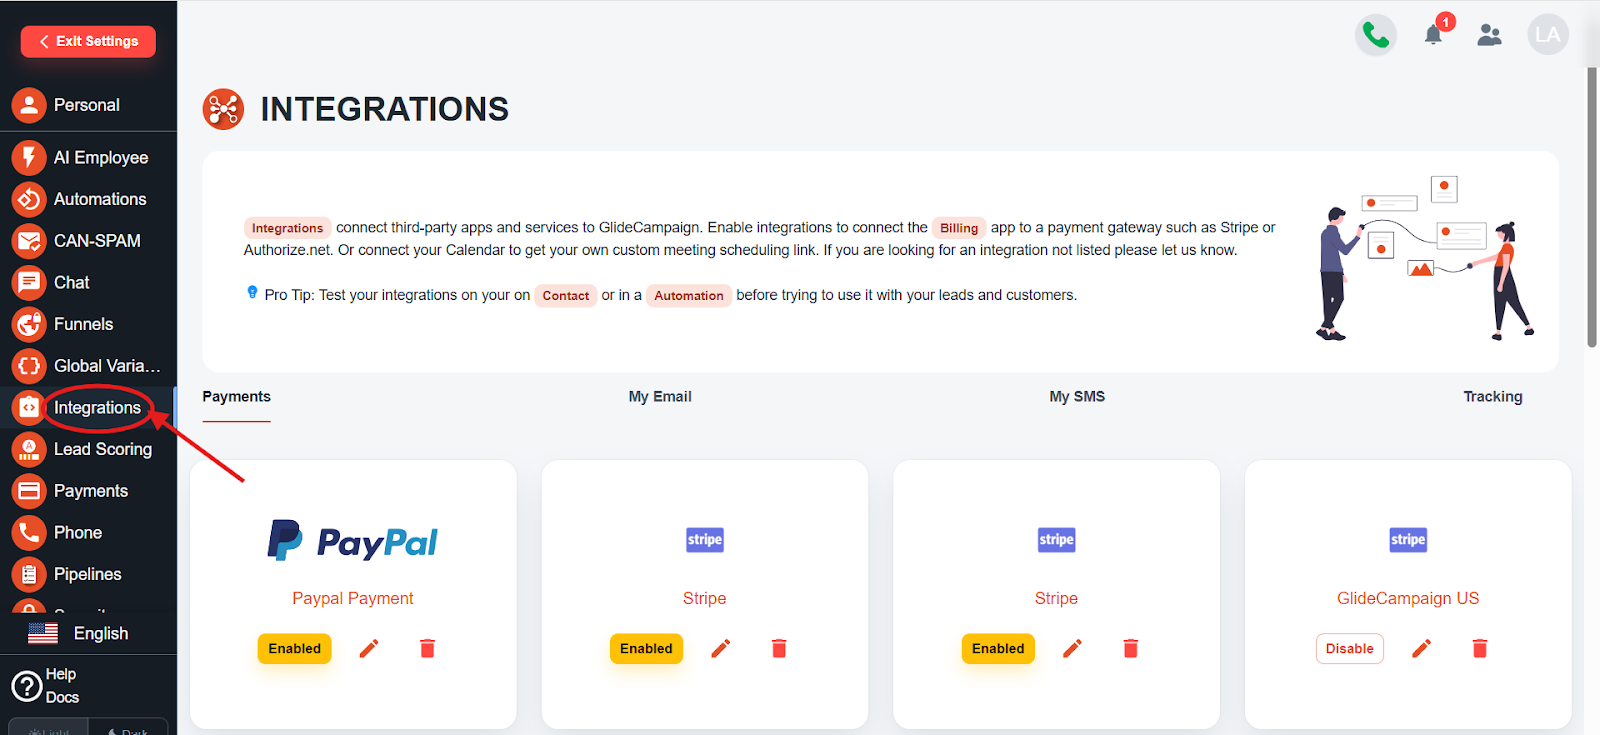
- Find Stripe Under Billing
Scroll to the Billing section where you will see the Stripe integration option.
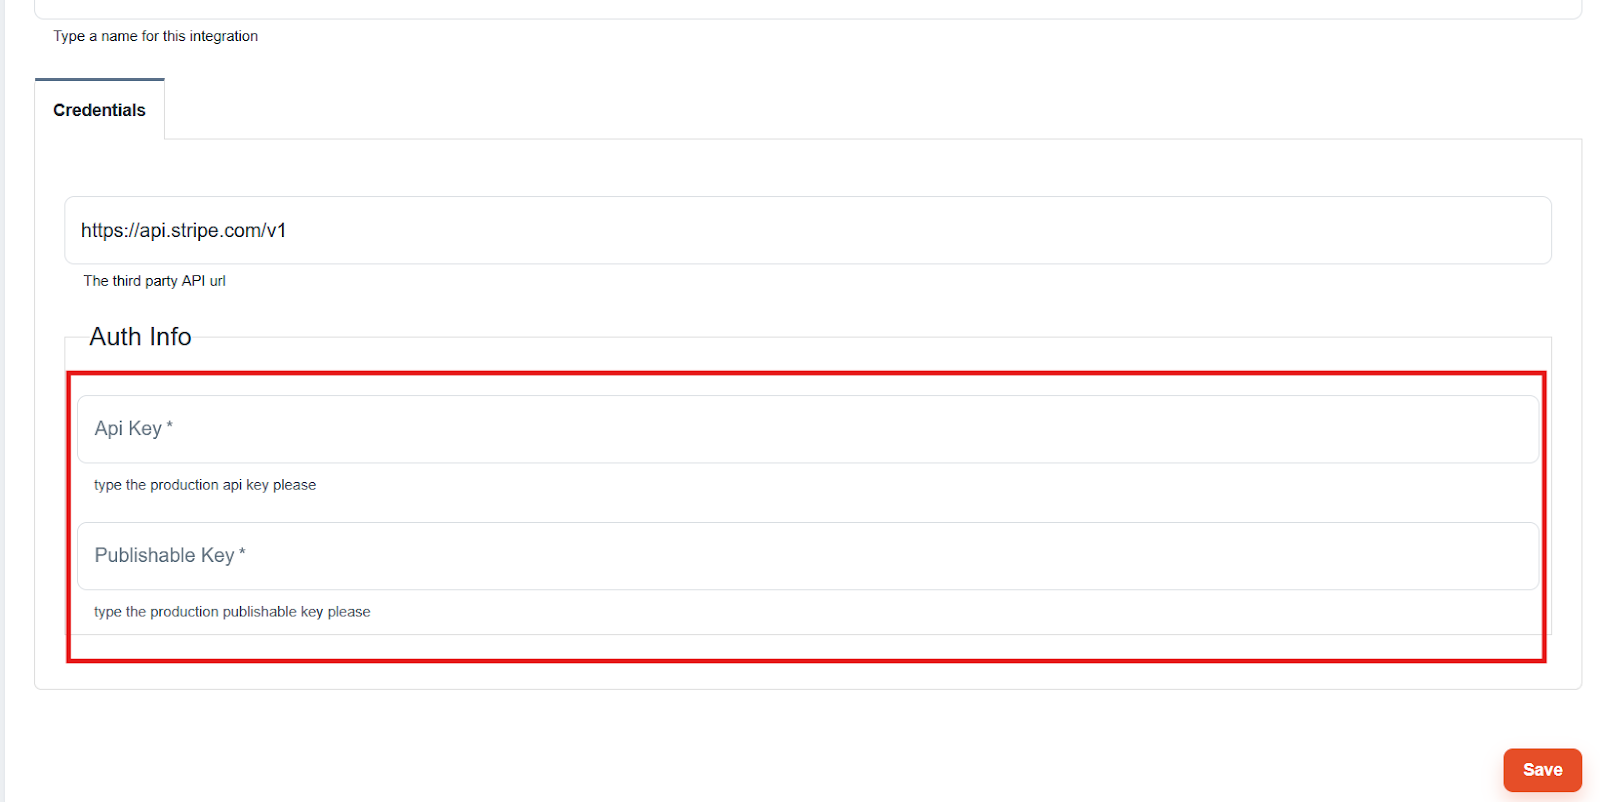
- Paste the Key and Save
Enter your API key and click Save to complete the integration.


