You can receive contact data into the platform via incoming webhooks—without any extra cost. The easiest way is by connecting the webhook to a form you’ve created.
1. Create a Form with All Required Fields #
- Go to the form builder and add the fields you want to receive via API.
- Click the gear icon on each field, then go to the “Field” tab to rename it.
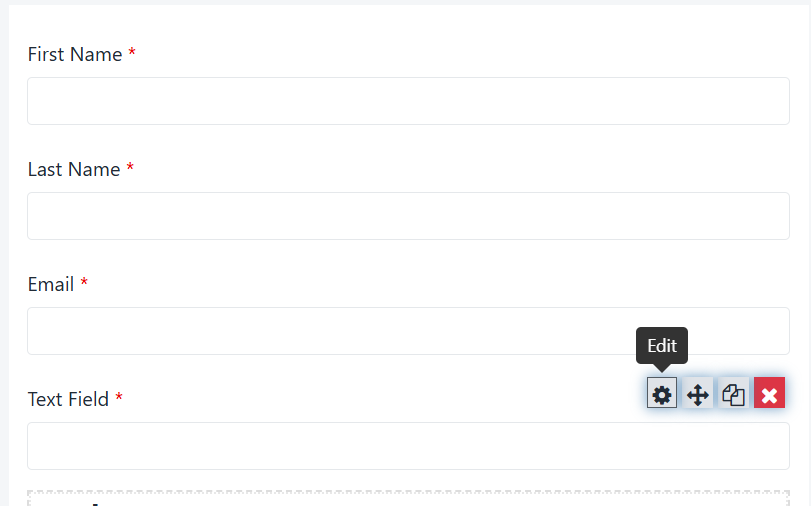
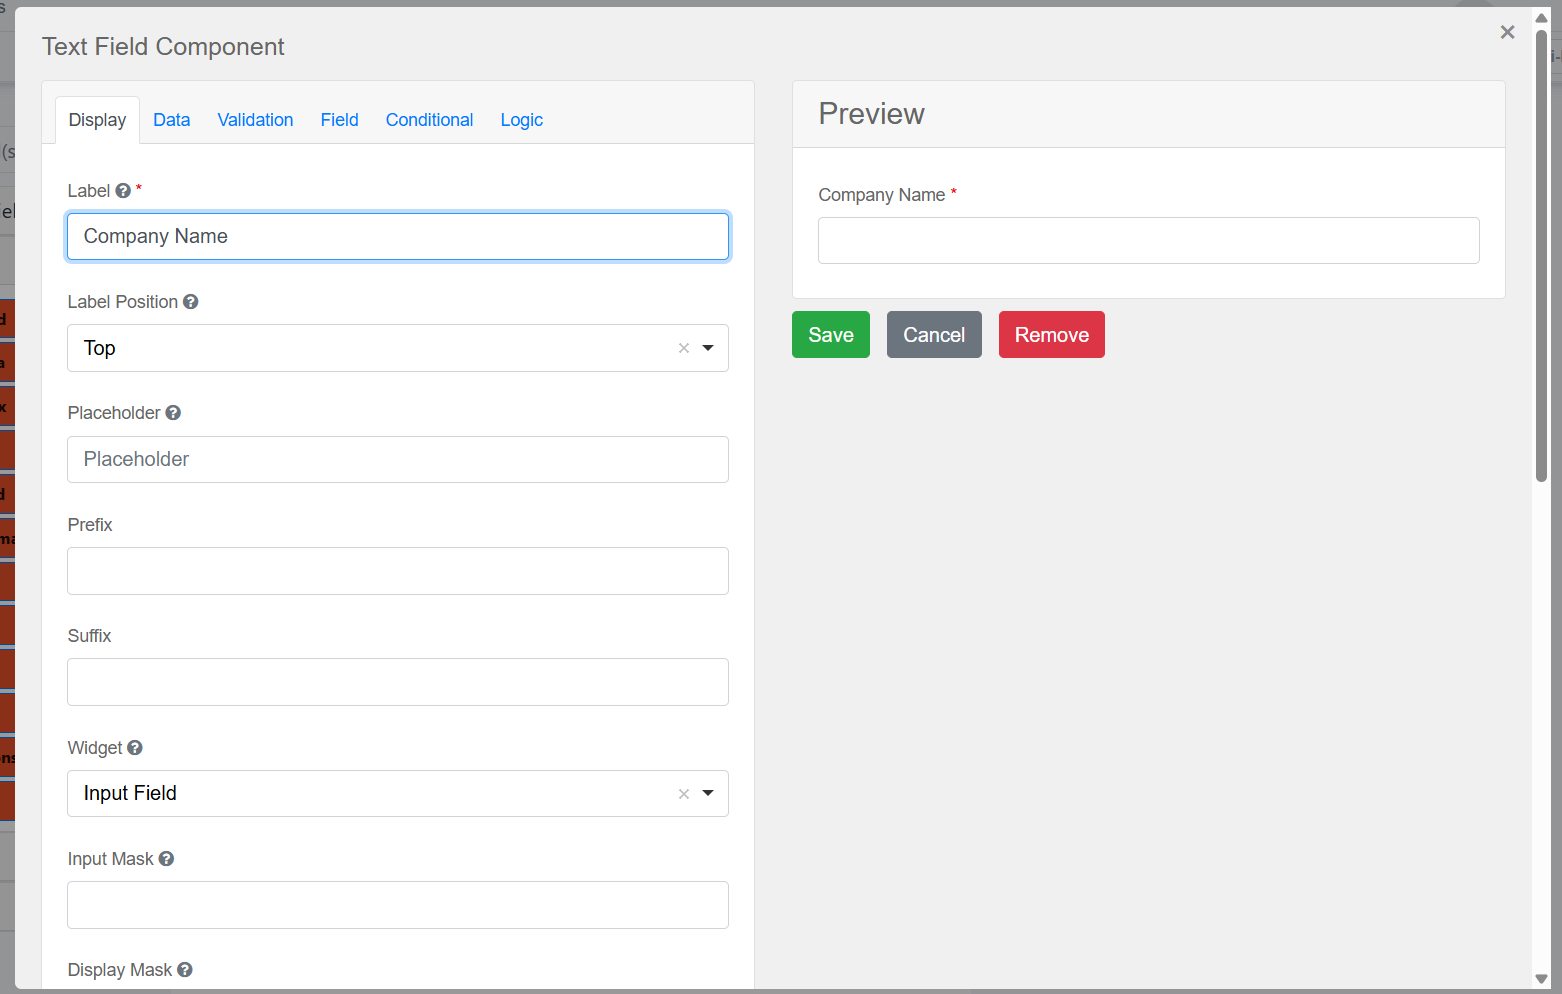
- Use clear and consistent field names like firstName, lastName, email, or your own custom identifiers (e.g., Company Name).
2. Get the API Endpoint #
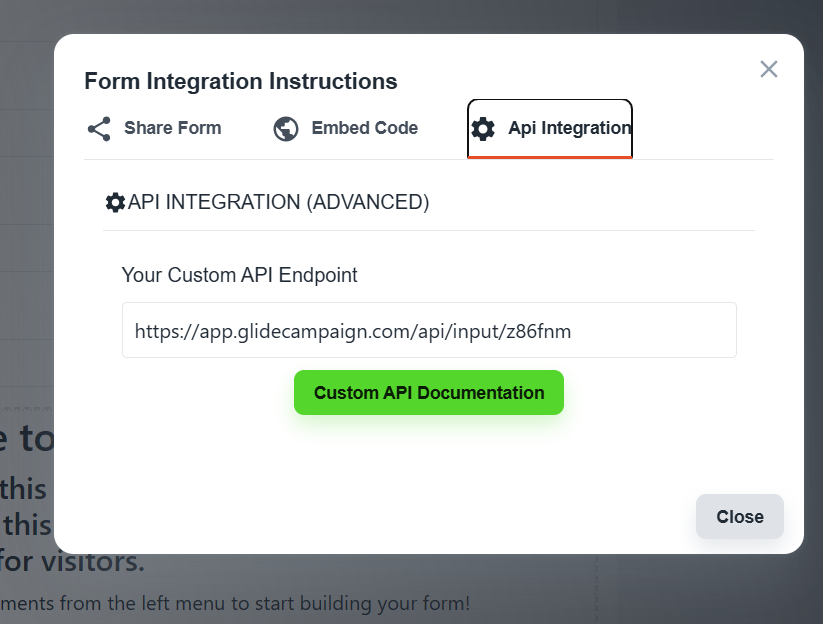
- After publishing the form, click “Integration Instructions” in the top right of the form builder.
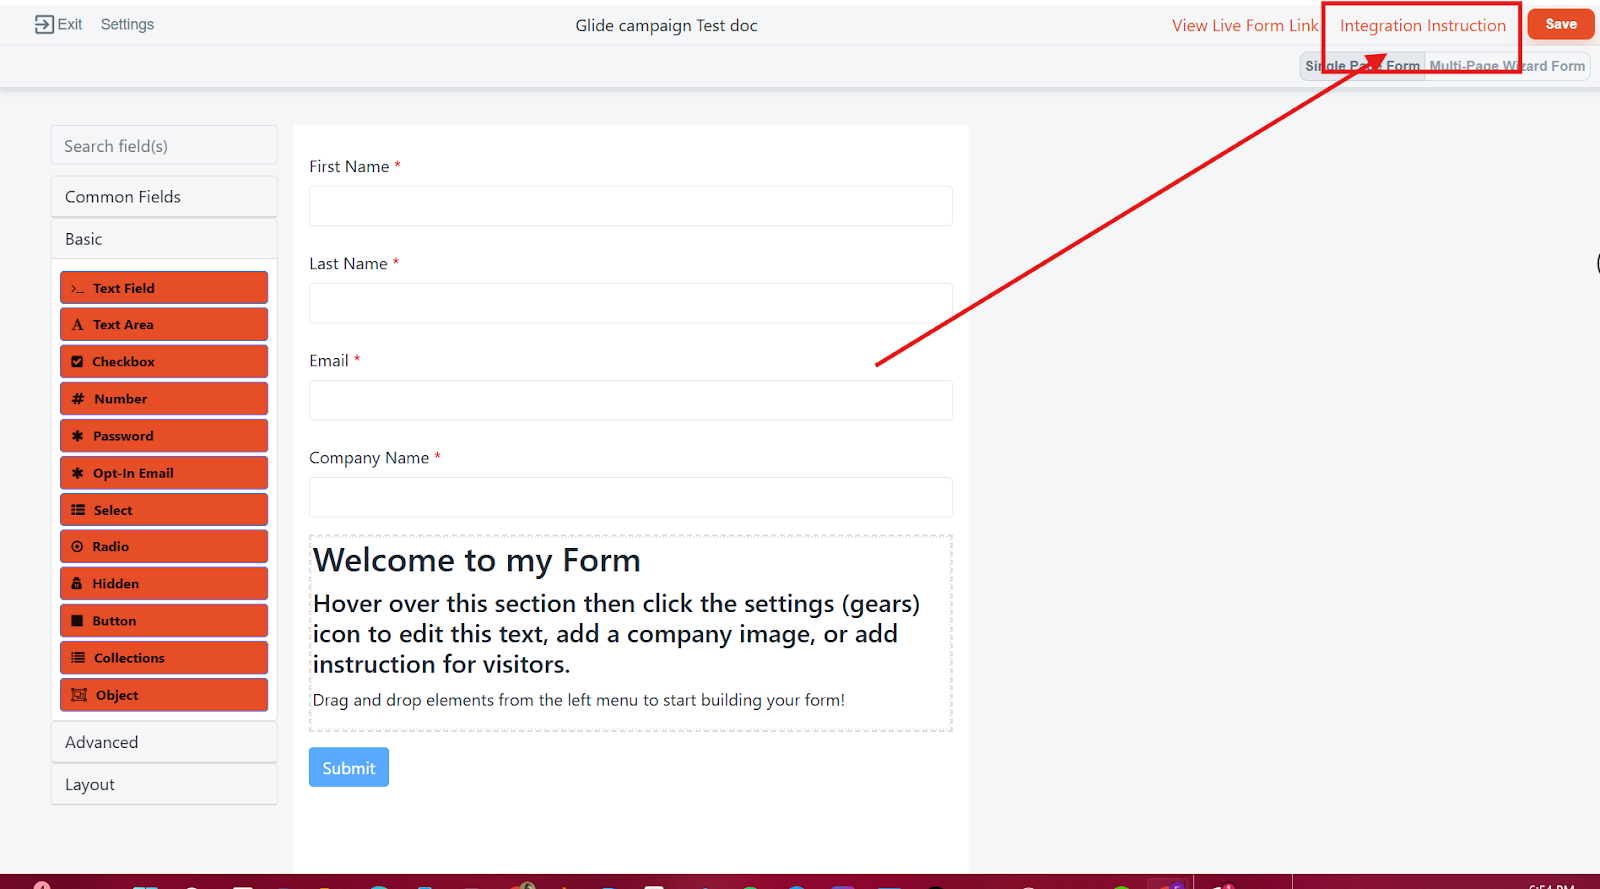
- Choose “API Integration” and click the green button.
3. Copy the Webhook URL #
- A new window will open with 4 tabs “Create Contact”, “Retrieve Contact”, “Update Contact” and “Delete Contact”.
- In the new window, go to the “Create Contact” tab.
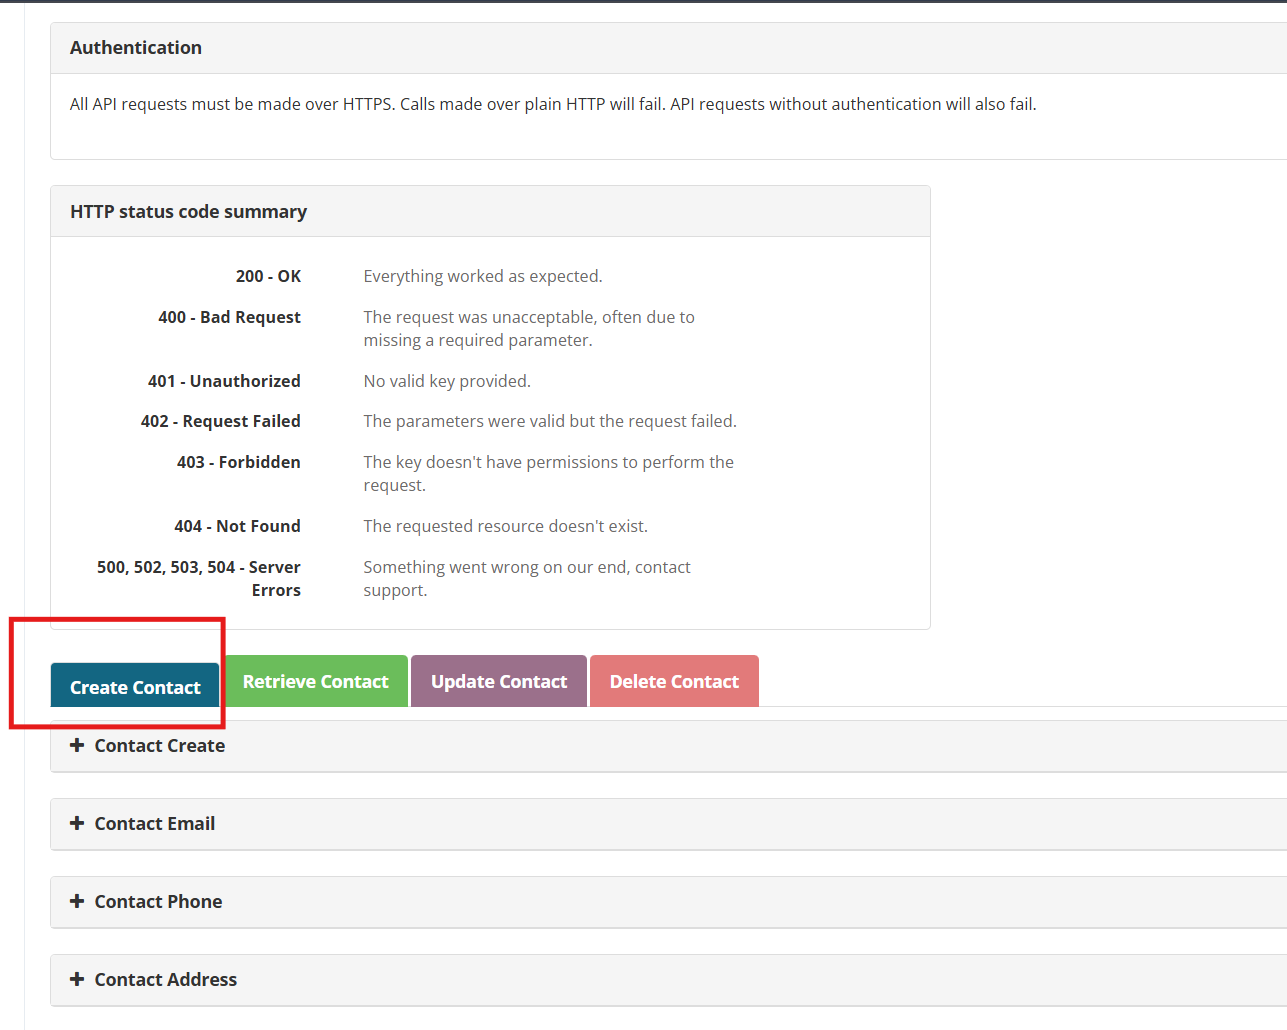
- Under the “Contact Create” section, copy the POST URL with your unique ?public_key= value.
- This key is unique to your form. Keep it private.

4. Review the Field Structure #
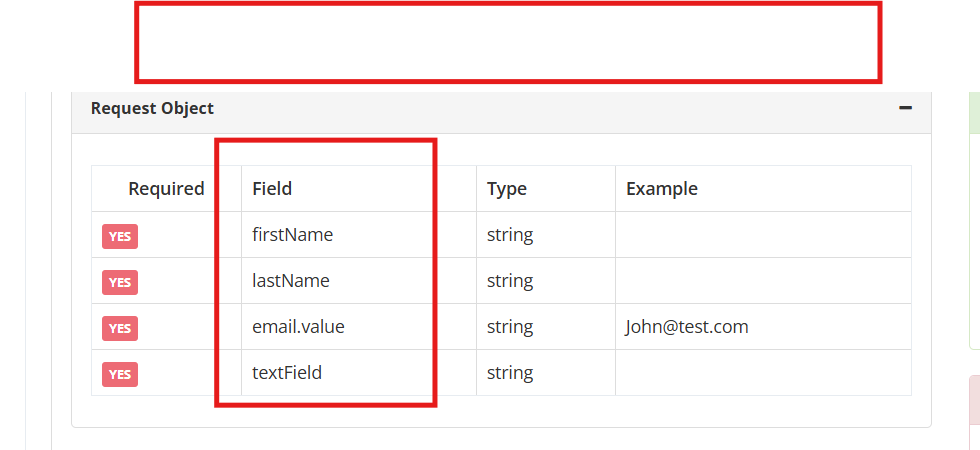
- Below the URL, you’ll see a “Request Object” showing all the form fields.
- These are the keys you’ll use in your incoming webhook payload.
5. Trigger a Flow with the Submitted Data #
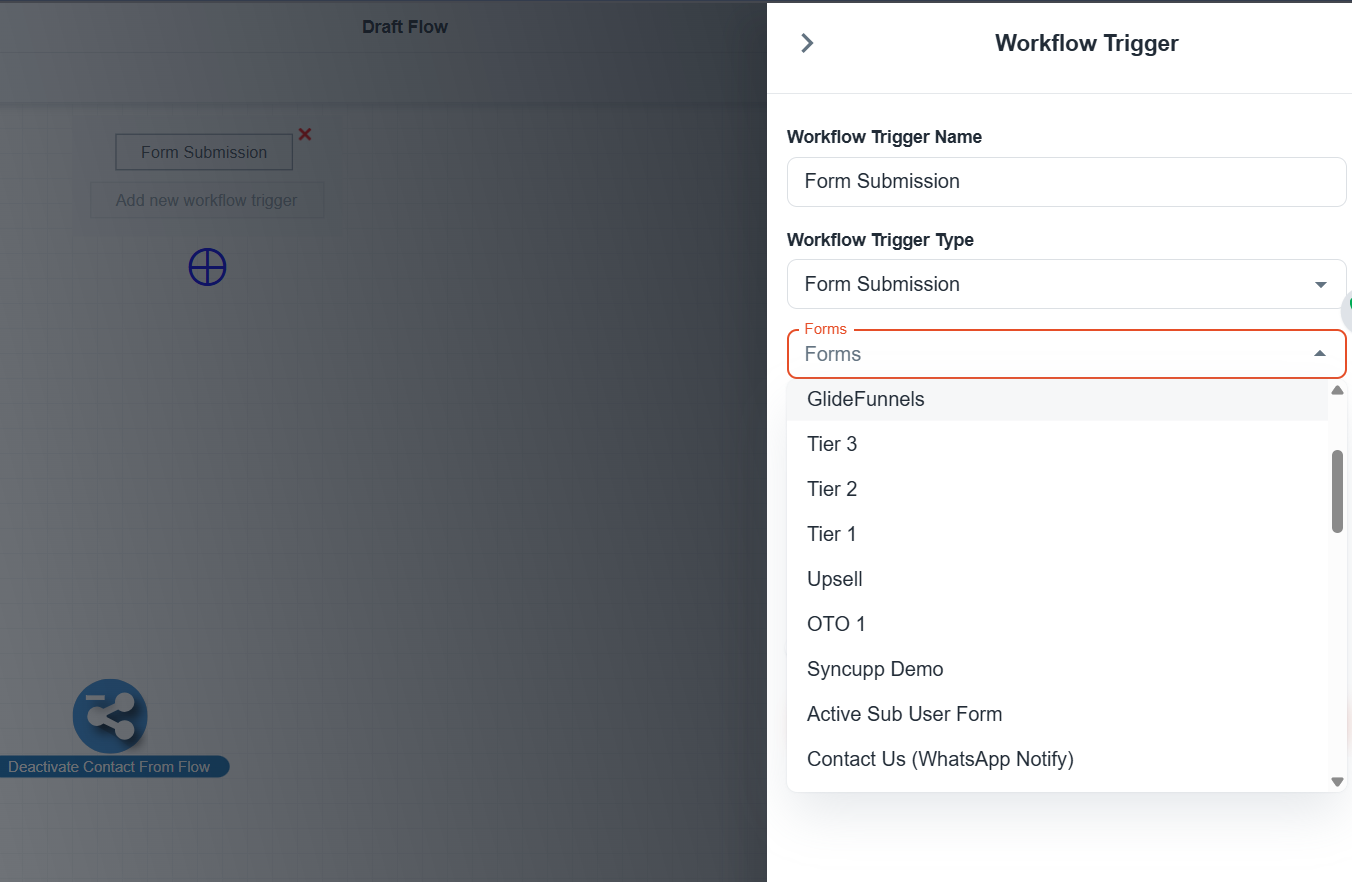
- In the automation flow builder, set “Form Submission” as the trigger.
- Choose the form you just created.
- Now, any webhook that submits to this form will trigger the automation flow.
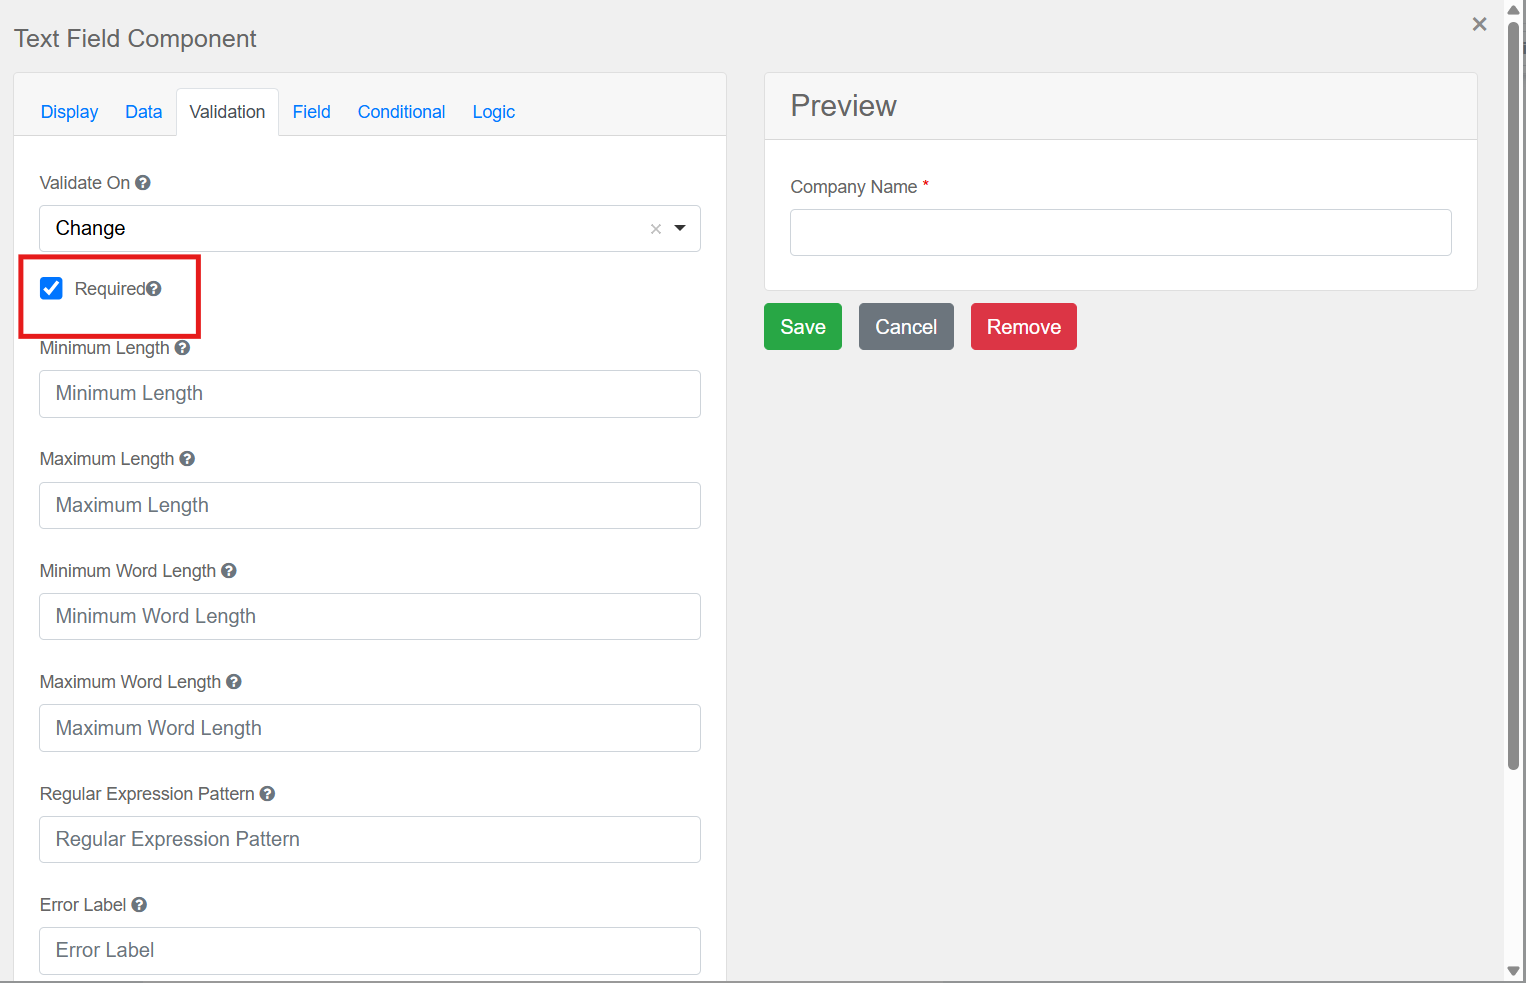
6. Set Field Validation #
- If a field is set to “required”, your webhook must include a value.
- To avoid errors when some fields may be empty, go to the Validation tab in the Form builder and set “required” to false for those fields.