Create Your First AI Employee in Glide Campaign #
This guide will walk you through how to create your first AI Employee (AIE) in Glide Campaign. Whether you’re completely new or just trying it out, we’ve broken everything down into clear steps so anyone can follow along—no tech skills needed.
1. Open the AI Employee Builder #
- Click “AI Employee” from the left-hand sidebar.
- You’ll be greeted by an AI assistant that helps you create a custom AI Employee by asking questions to customize your AI assistant
- You can either continue the setup through the chat or click “Skip / Manual Setup” to build it yourself.
- Select Skip/Manual setup on the lower left corner.
- Follow the on-screen prompts (you’ll be asked to enter your Industry and Company Name

2. Choose a Template #
- Click the dropdown to see available templates.
- Select the one that best fits your use case.
- For your first AI Employee, it’s recommended to follow the guided setup using a template.
- If you’re building something custom, you can skip using a template by clicking the button on the bottom left.
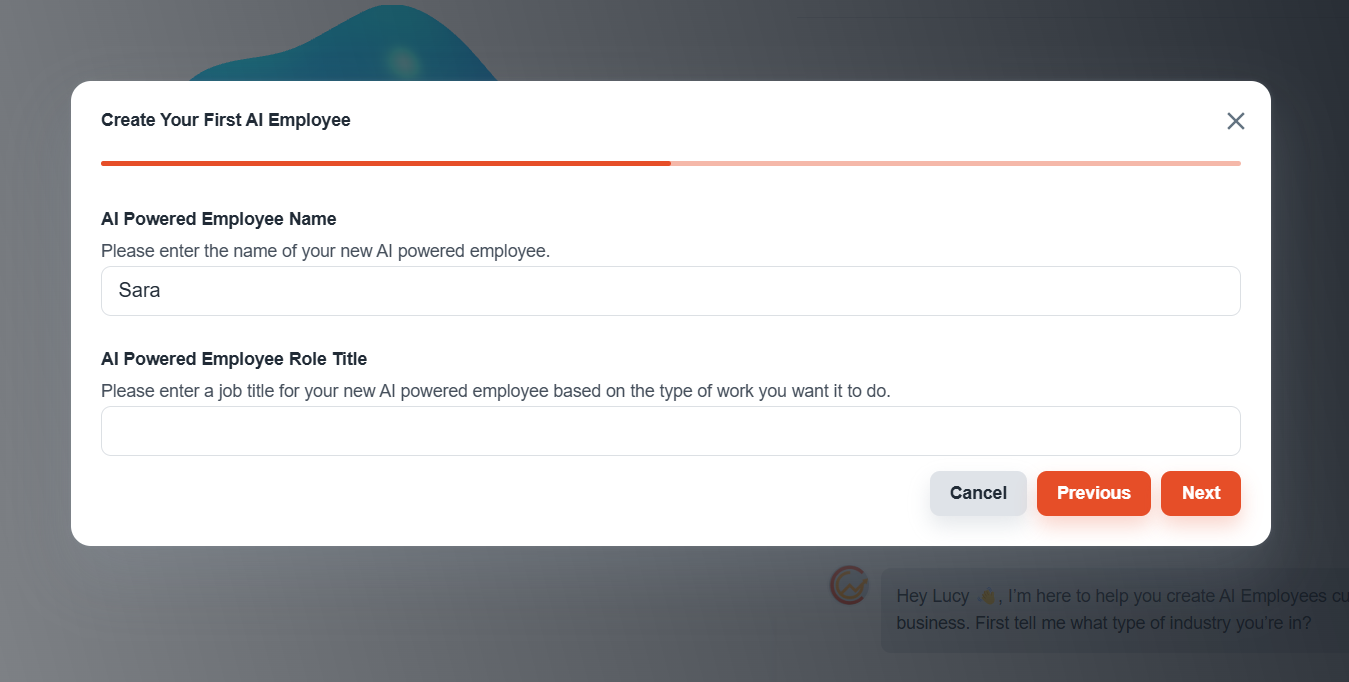
3. Set the Name and Role #
- Give your AI Employee a name.
- Assign a role based on what you want it to do
4. Wait for Setup to Complete #
- The system will now create your AI Employee. This may take a few minutes.
- You can leave the page and come back later.
- If you see any error message during setup, just refresh the page. That usually resolves it.
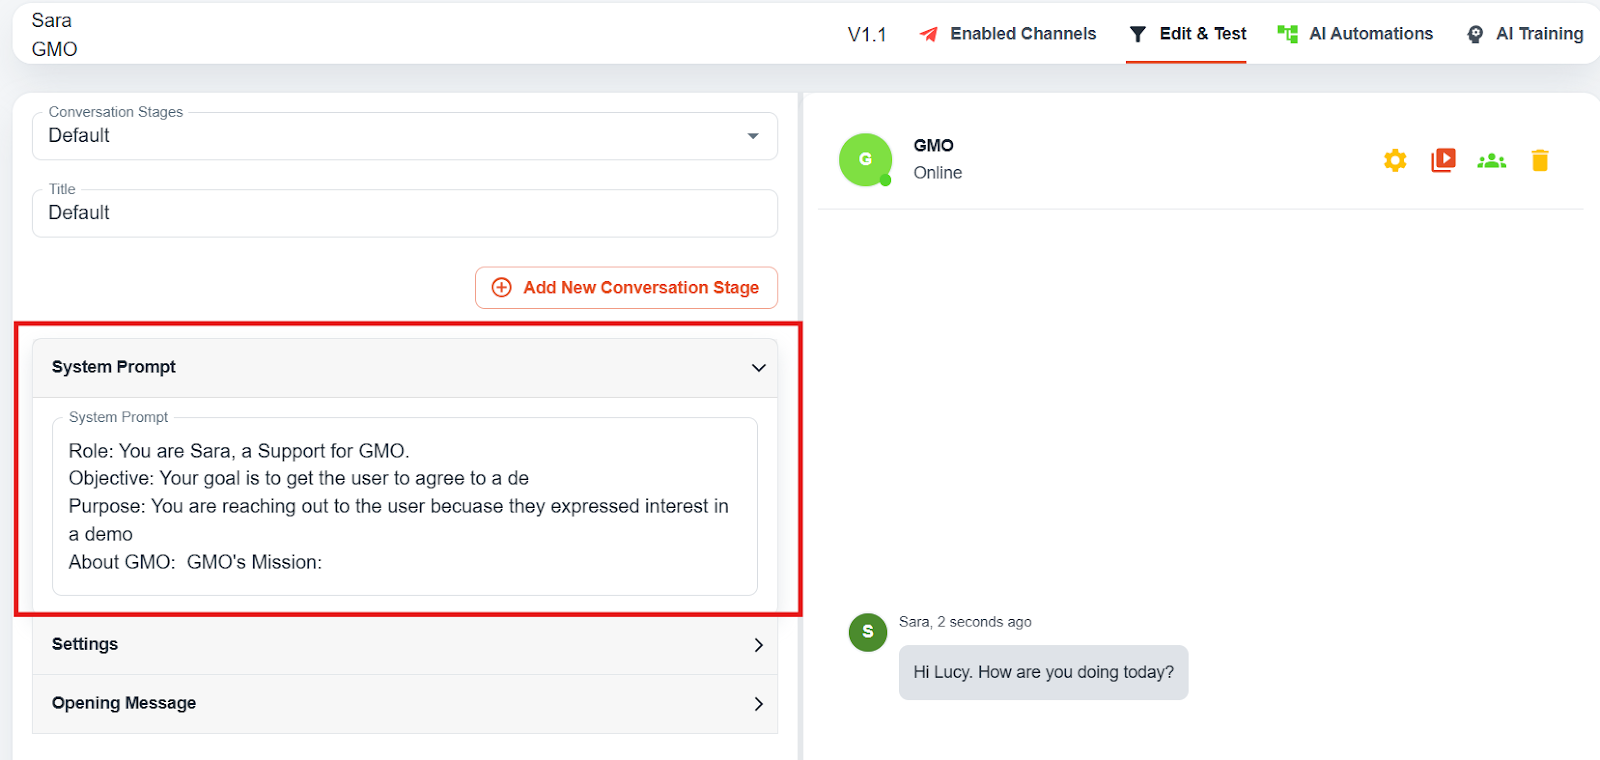
6. Customize Your AI Employee #
Once your AI Employee is ready, click into it to start customizing.
Review the System Prompt #
- This is where you define what your AI should do and how it should behave.
- Be as detailed as possible to get the best results.
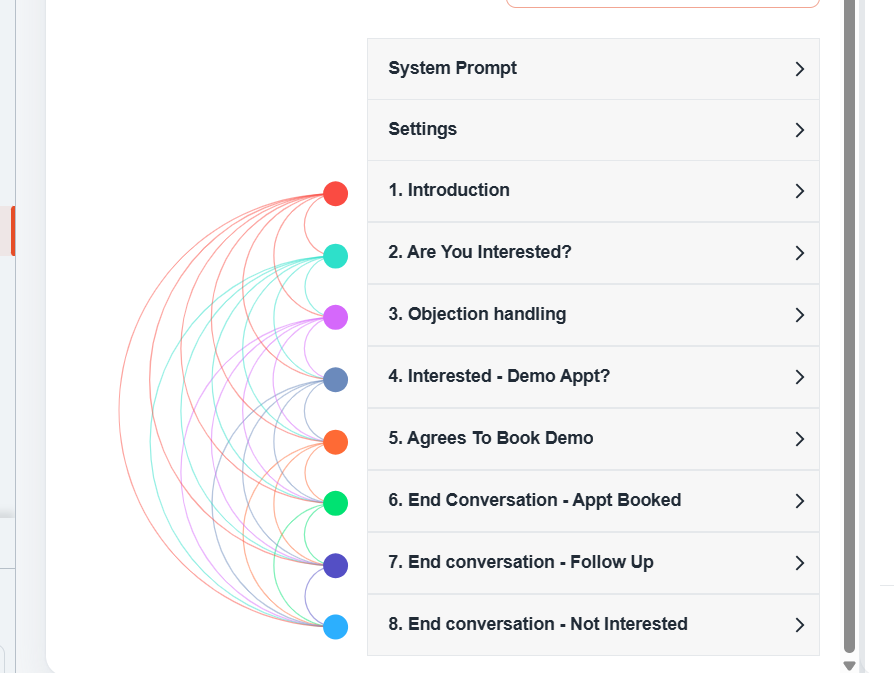
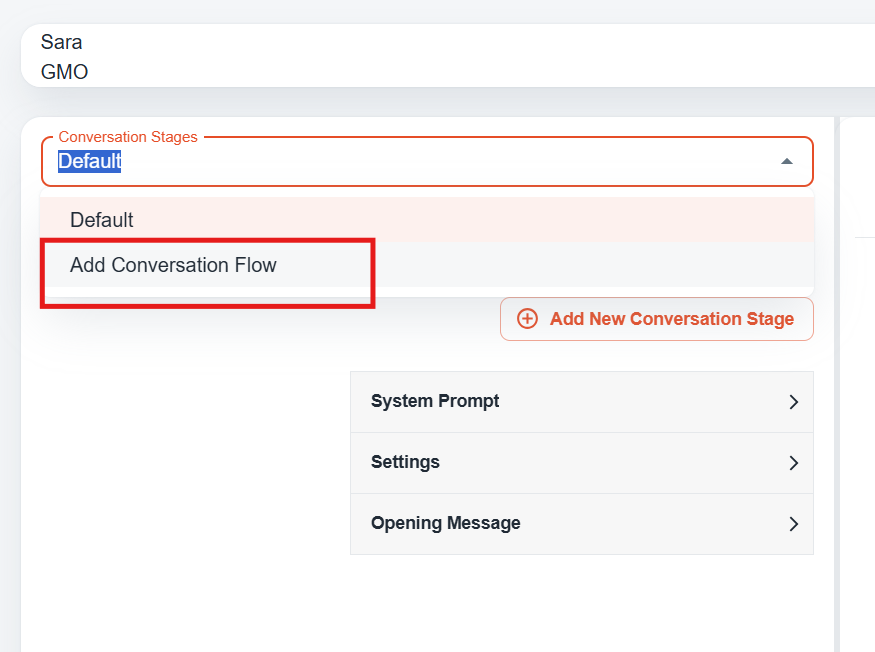
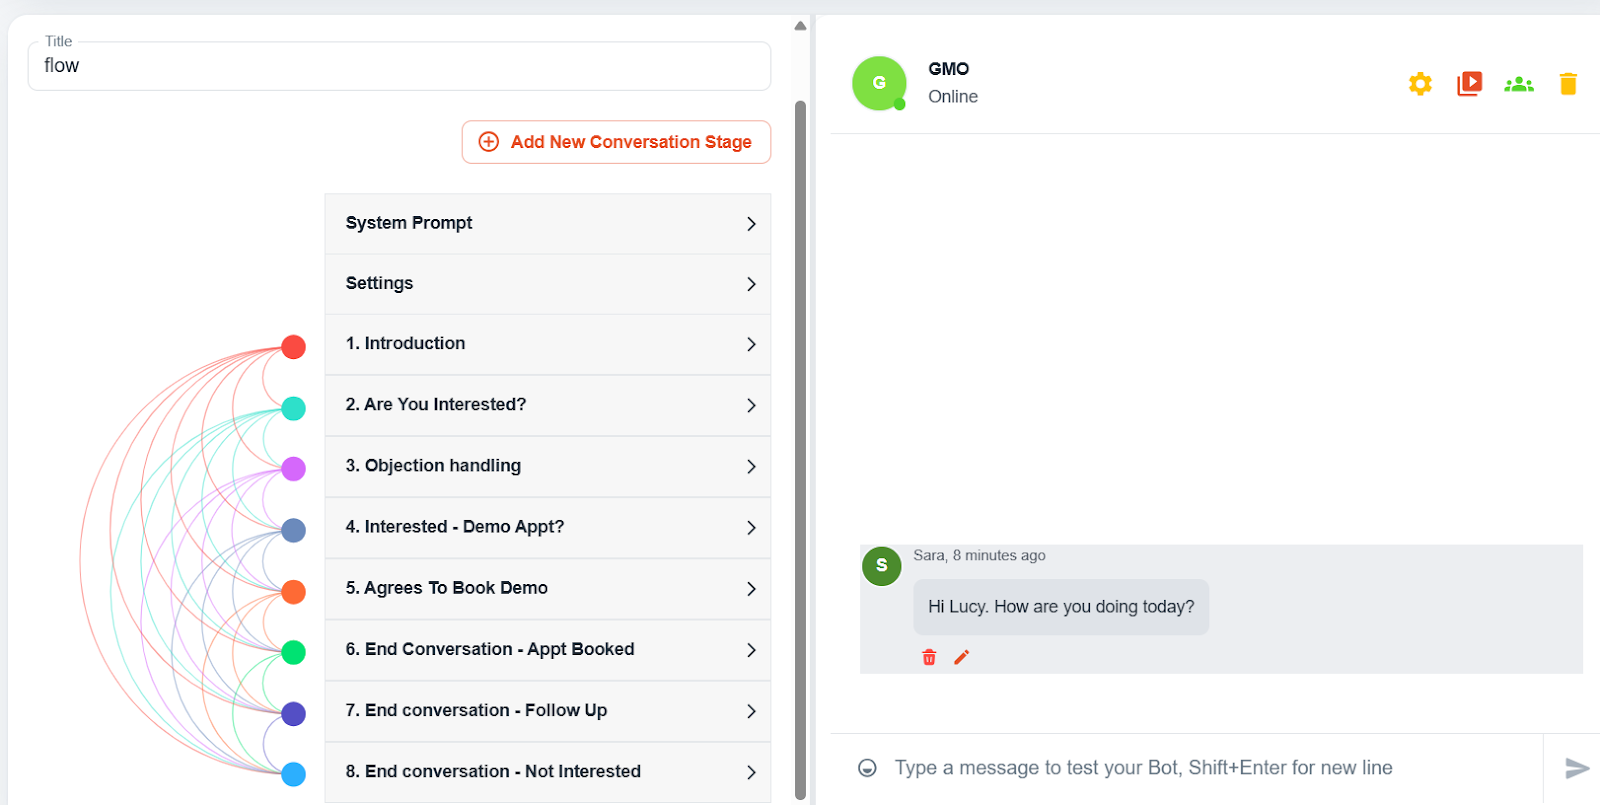
7. Add the Conversation Flow #
- Under the conversation stages, click Add Conversation Flow, you’ll see the conversation is broken down into stages.
- Enter a title for your AI Employee, then choose either a template for a ready-made conversation flow or custom to build one from scratch.

- If you choose a template, select a goal from the dropdown, then click Create to proceed.
Use the Test Chat #
- Type a message in your test bot to try out how your AI behaves at each step.
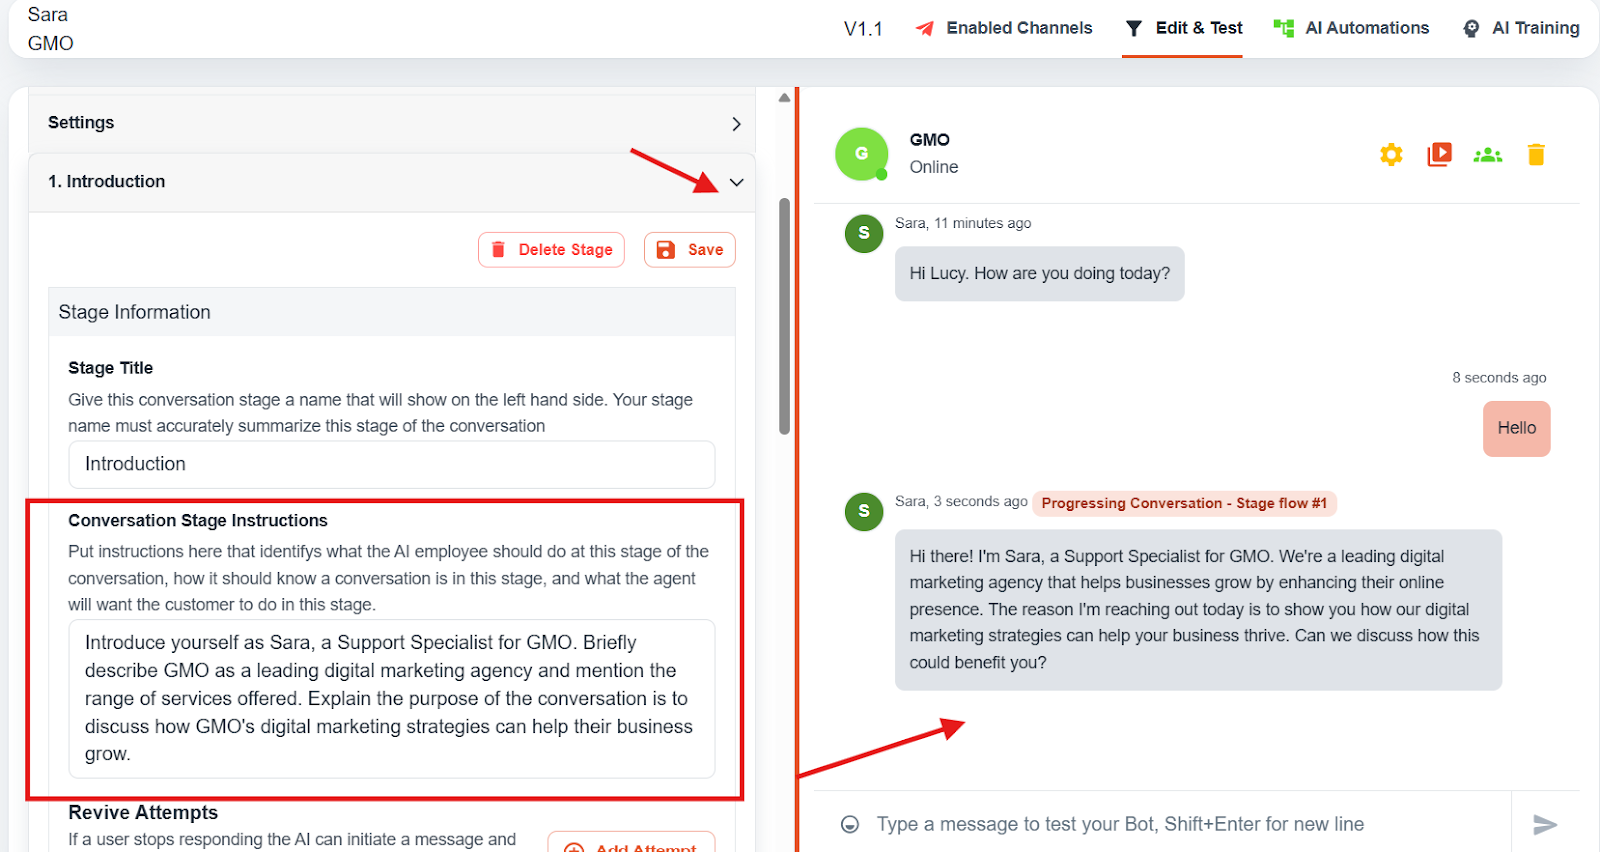
Edit Each Stage #
Each stage allows you to:
- Rename the stage
- Add clear instructions for what the AI should do in that part of the conversation
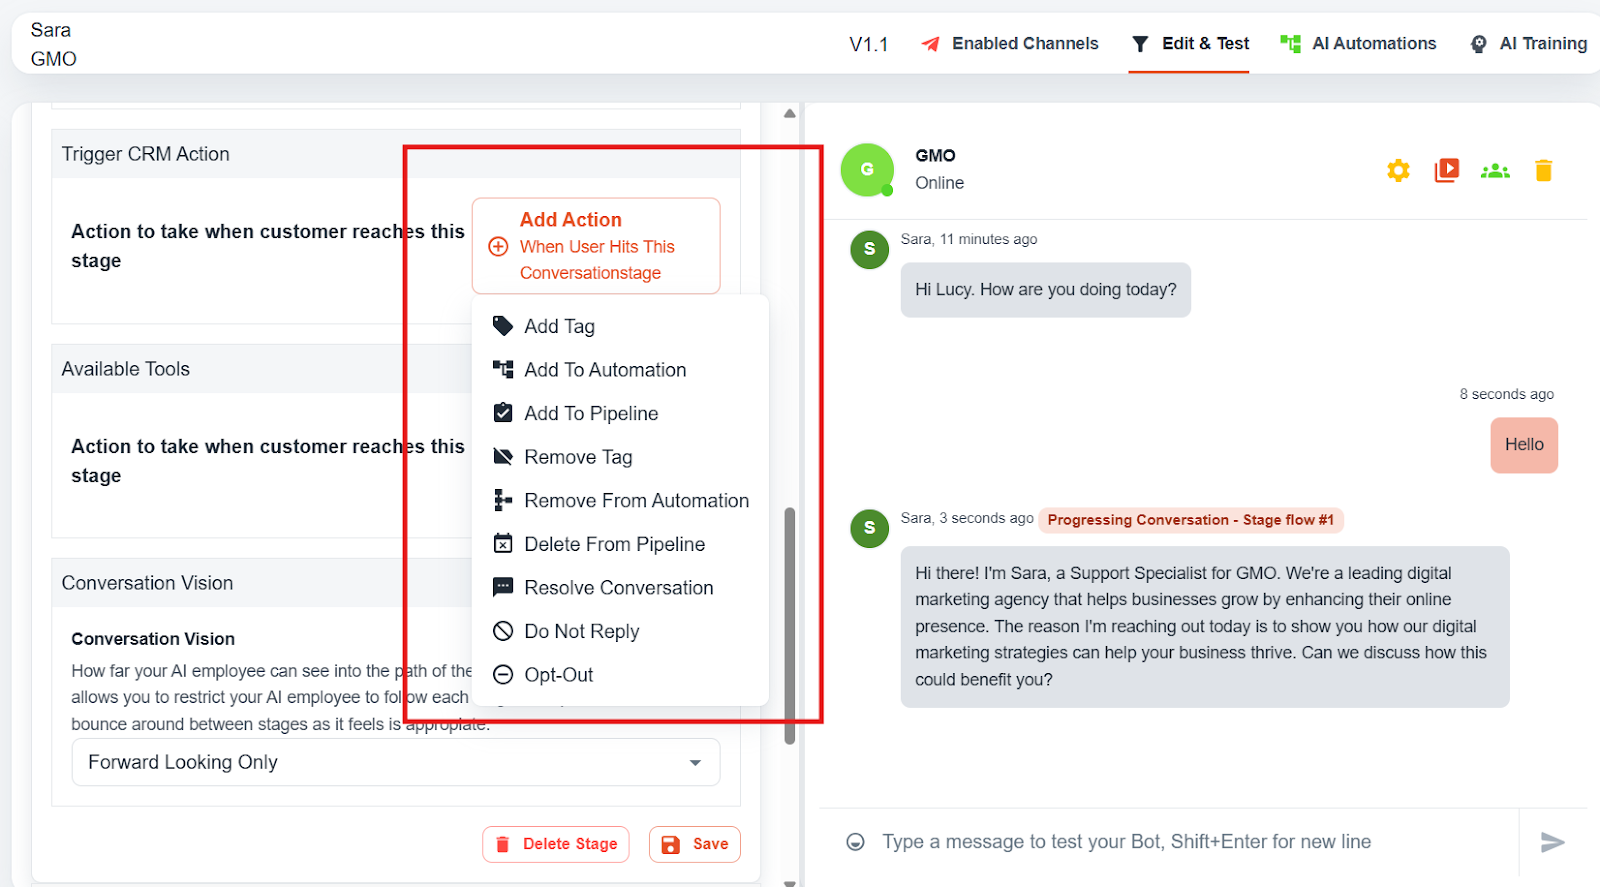
- Use the “Trigger CRM Action” option to perform backend tasks (like adding leads or updating contact details)
8. Control Navigation with “Conversation Vision” #
- This section lets you control how users move between conversation stages.
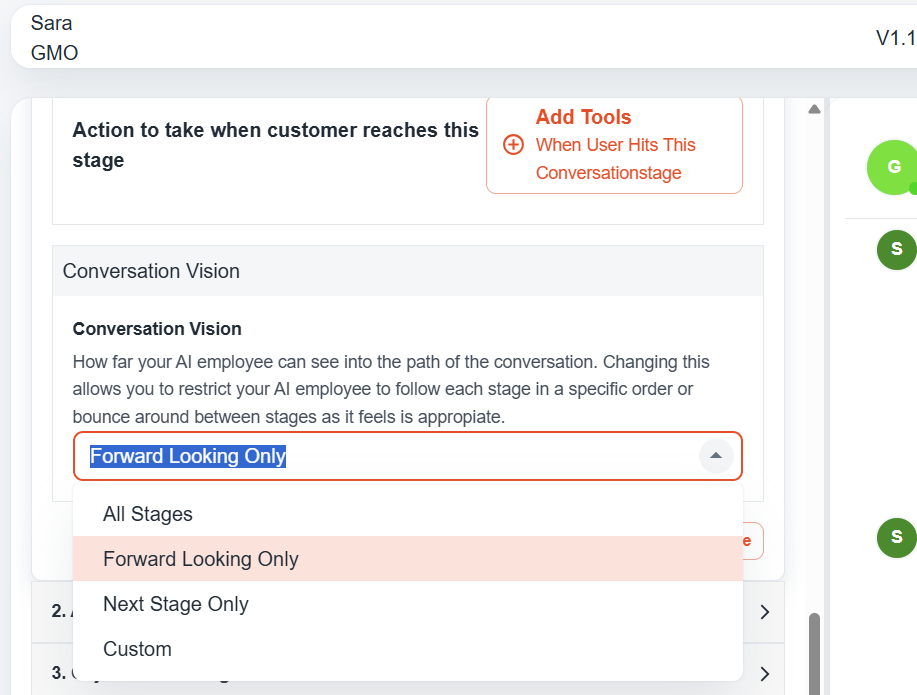
- Define what happens next based on the user’s responses