Create a contact flow #
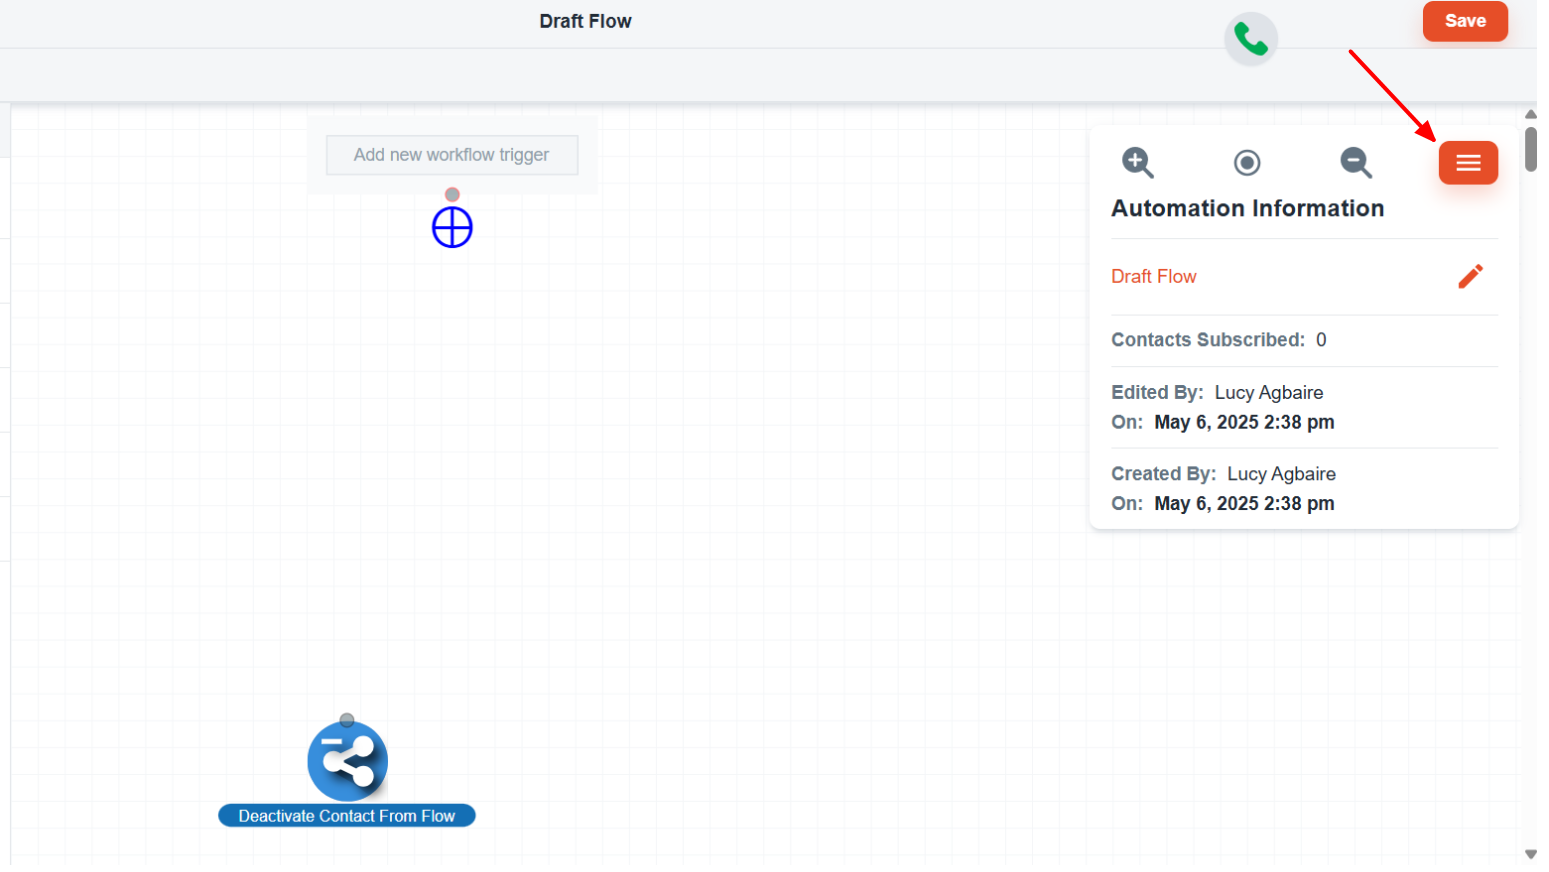
1. Open the Flow Editor
Go to the flow editor and click the hamburger icon on the right side of the screen.
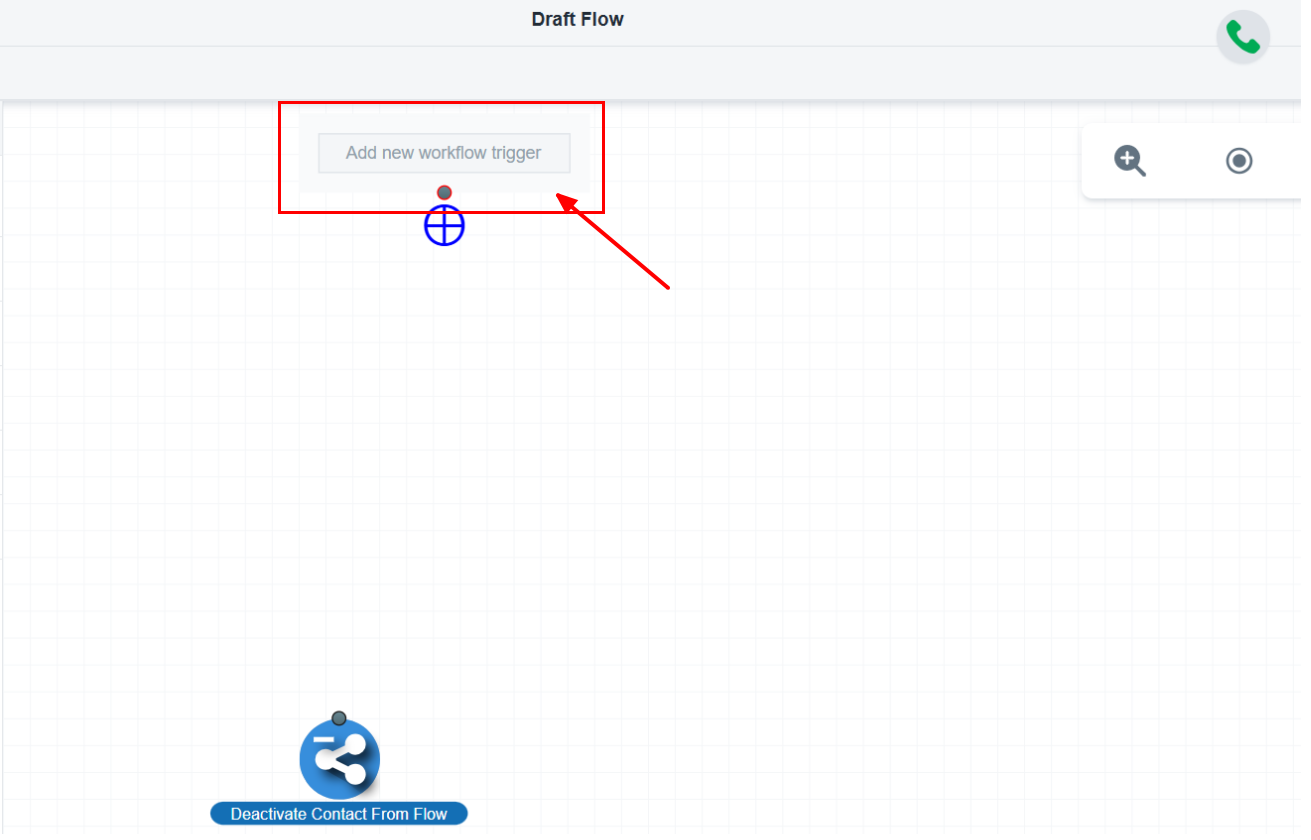
2. Remove Existing Triggers (Optional) #
If any existing triggers are present, you can remove them.
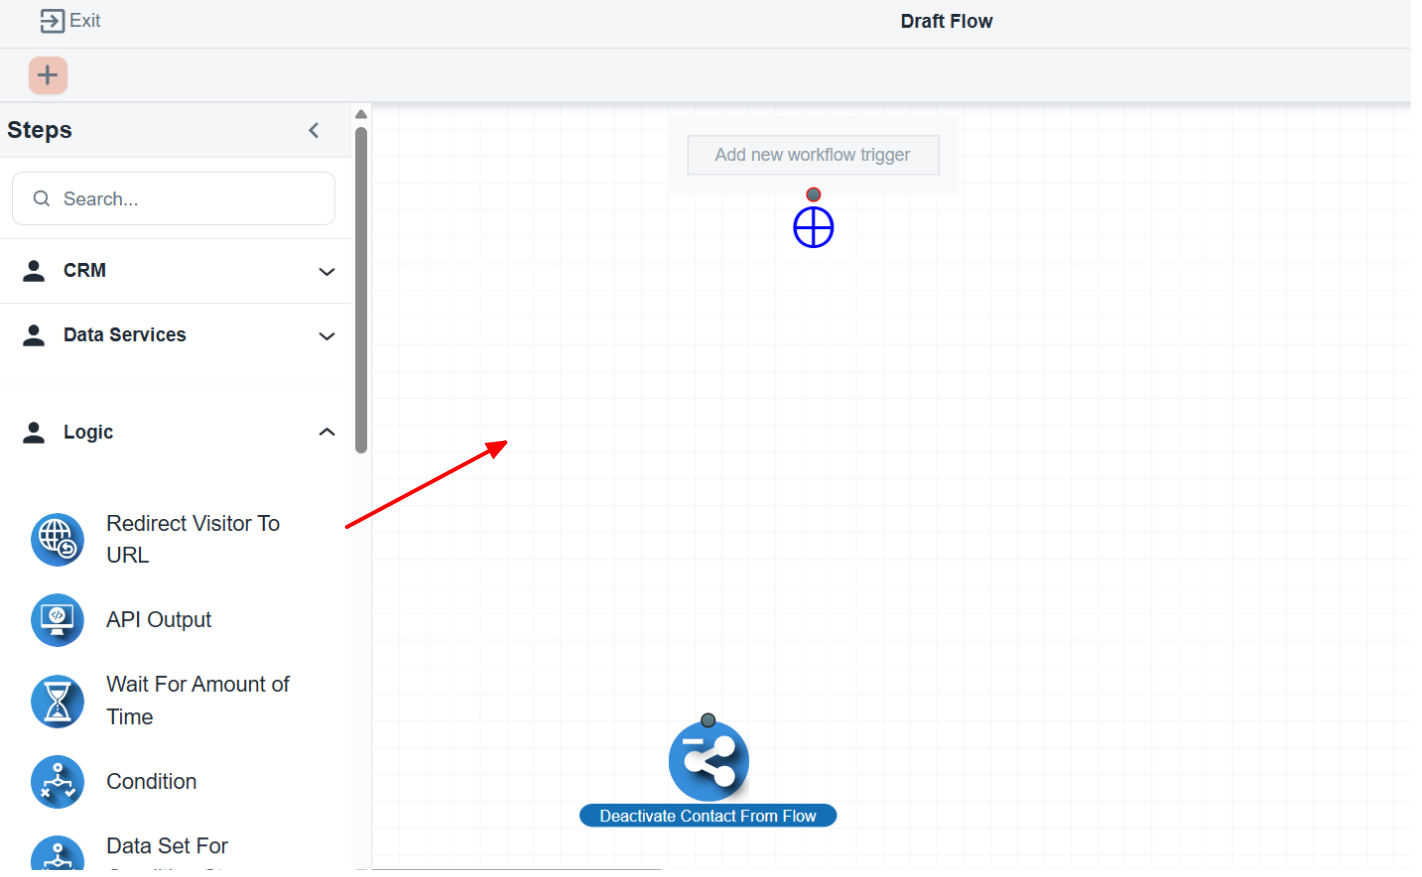
3. Add a New Trigger #
Click the plus icon to add a new trigger.
Under the CRM tab, select Meeting Scheduled and save the setting.
4. Add Redirect Step #
In the Logic section, locate the Redirect Visitor to URL step.
Enter the link to the form you want to redirect users to.

5. Save and Publish #
Save your settings and publish the flow.


